Office Connectors / Application Preference Settings
Before using the Word, Excel and Outlook Connectors the user will need to configure the preferences for MAGIQ Documents.
Note
Once preferences have been configured on the first workstation, they can be exported to a network drive and imported to other workstations using the Office Connector.
Login
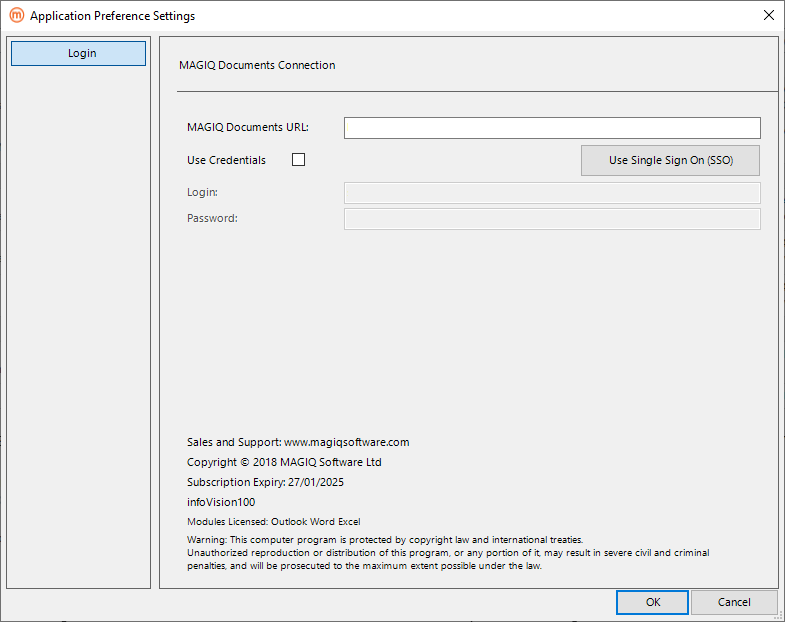
MAGIQ Documents URL - the URL of MAGIQ Documents.
Use Credentials - Tick to manually enter your username and password.
Use Single Sign On (SSO) - Clicking requires authentication to the URL specified for example https://{customer name}.magiqcloud.com.
If successful, the browser will show a 'Login Successful' message.
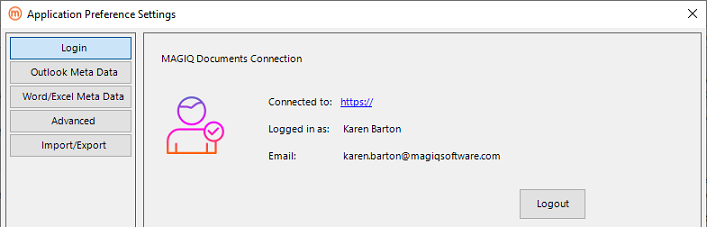
If logged in, it will look like:
The below is not required for the connectors using SSO (Only for version 8.6.169 and below.)
Login - your MAGIQ Documents user name or email address (if a cloud customer).
Password - your MAGIQ Documents pass or your MAGIQ Cloud password.
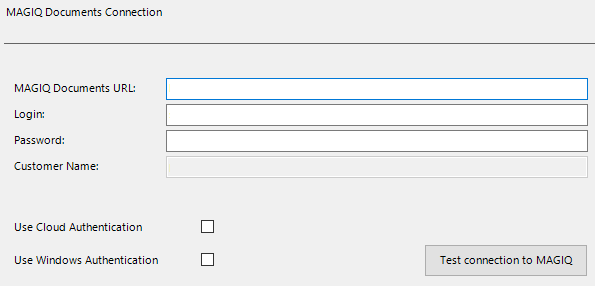
Use Cloud Authentication - Only tick if you are using MAGIQ Cloud.
Use Windows Auhtentication - Only tick if you are an on-premise customer using Single Sign On.
Test Connection to MAGIQ - click to ensure you have connected successfully.
Prerequisites:
- Your username and email address must match your username and email address within MAGIQ Documents.
- Your MAGIQ Documents username and email address must match what is used by MAGIQ Cloud.
- The username in MAGIQ Cloud is limited to 16 Characters. If using {firstname}.{surname} as the username, you will need to change in MAGIQ Documents and MAGIQ Cloud to be less than 16 characters.
Login for cloud customers (Full platform (MAGIQ Enterprise and MAGIQ Documents)
What information do I enter?
- Leave the MAGIQ Documents URL as blank, as the advanced area will automatically populate the URL.
- Enter your Login as your email address.
- Enter your Password as your MAGIQ Cloud password.
- Tick Use Cloud Authentication.
- Enter Customer Name as your customer name from the URL.
For example:
Login for cloud customers (Full platform with Microsoft, Auht0 or Okta authentication)
What information do I enter?
- Enter your MAGIQ Documents URL as .
- Enter your Login as your MAGIQ Documents user name.
- Enter your Password as your MAGIQ Cloud password.
For example:
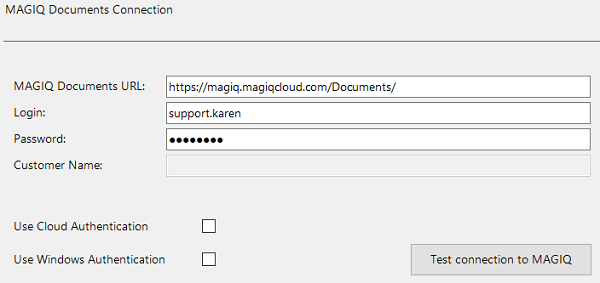
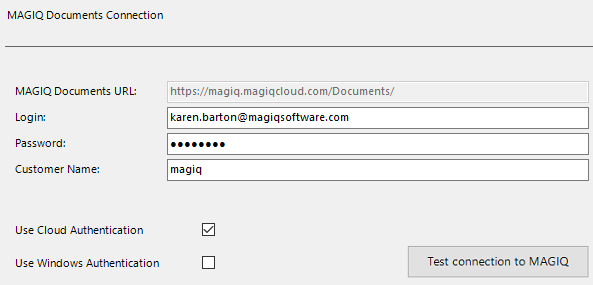
Login for cloud customers (Documents Only)
What information do I enter?
- Enter your MAGIQ Documents URL as https://{customer name}.magiqcloud.com/Documents/
- Enter your Login as your MAGIQ Documents user name.
- Enter your Password as your MAGIQ Cloud password.
For example:
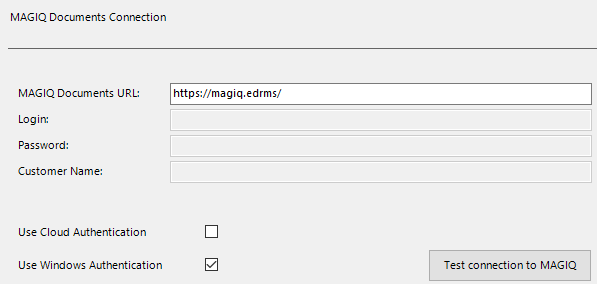
Login for On-Premise customers using Single Sign On (SSO)
Prerequisites:
- Your MAGIQ Documents username must match your windows username.
- Your MAGIQ Documents authentication source set to your domain name.
What information do I enter?
- Enter your MAGIQ Documents URL.
- Your Login and Password are not required.
- Tick Use Windows Authentication, this will disable the login and password fields so that it uses your windows credentials.
For exmaple:
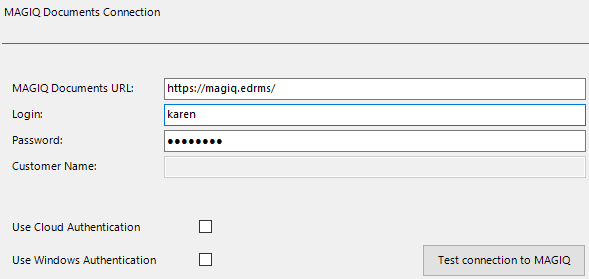
Login for On-Premise customers using NATIVE authentication
Native is determined by how the user is configured within MAGIQ Documents. With Native specified, the user will always need to enter their username and password.
What information do I enter?
- Enter your MAGIQ Documents URL.
- Enter your Login as your MAGIQ Documents username.
- Enter your Password as your MAGIQ Documents password.
Note
The user will need to update this password when their password to access MAGIQ Documents is changed.
For example:
Outlook Metadata
The purpose of the Meta Data settings is to:
- Identify (match) which MAGIQ Document fields (including custom property sets) are automatically populated with data from the email message.
- Specify the email message data that will be automatically populated in these fields.
- The format of the email to be saved.
- Actions to the original email once it is saved within MAGIQ Documents.
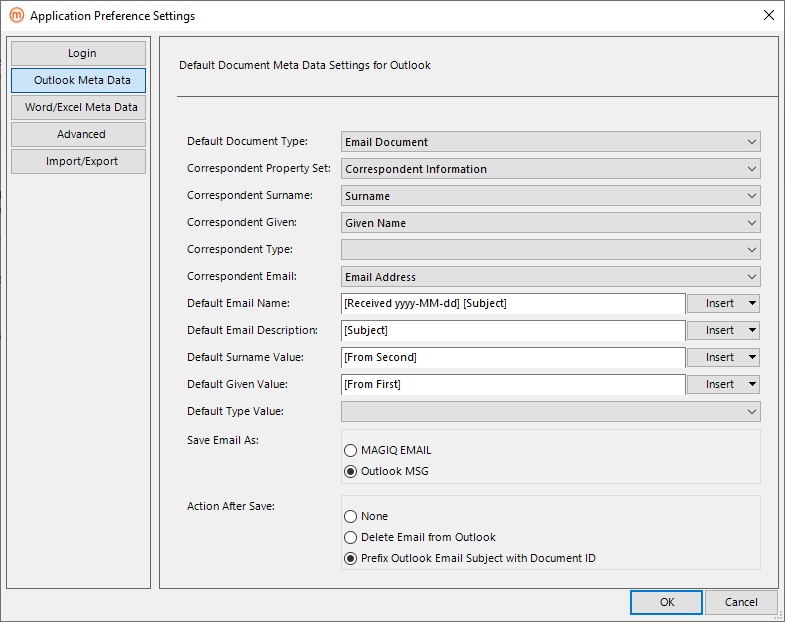
Default Document Type - Specify which document type to be used for emails and attachments.
Correspondent Custom Property Set - Custom property set used for correspondent meta data. For example, Correspondent Information.
Correspondent Surname - Based on the correspondent property set specified, select which field is used to store the correspondent's surname. This relates to the Default Surname Value.
Correspondent Given - Based on the correspondent property set specified, select which field is used to store the correspondent's given name. This relates to the Default Given Value.
Correspondent Type - Based on the correspondent property set specified, select which field is used to store the correspondent type (e.g. Author, Addressee or Signatory). Leave blank if you do not have this field. This relates to the Default Type Value.
Correspondtent Email - Based on the correspondent property set specified, select which field is used to store the correspondent's email address.
Default Email Name - The reason for this field is that many Email subjects are generic such as Email, and do not make a good document name within MAGIQ Documents.
Specify which options from the below will define the MAGIQ document name.
Click Insert to specify your naming conventions. A combination of Text, Received Date, Subject and the Senders Name can be used.
The options are:
- Received Date – displays as [Received yyyy-MM-dd].
- Received Datetime - displays as [Received yyyy-MM-dd-HH-mm].
- From Full Name - full name of Sender - e.g. "John Smith".
- From First Name - first word of Sender - e.g. "John" if sender is "John Smith".
- From Second Name - second word of Sender - e.g. "Smith" if sender is "John Smith".
- Subject - email subject.
NULL – The Name will come through blank and the user will need to enter an email name.
Note
If the Sender does not have a display name (e.g. support@magiqsoftware.com) both [From Full] and [From Second] is populated within this value.
Default Email Description - Document Description. Click Insert to specify your description variables.
The options are:
- Received Date – displays as [Received yyyy-MM-dd].
- Received Datetime - displays as [Received yyyy-MM-dd-HH-mm].
- From Full Name - full name of Sender - e.g. "John Smith".
- From First Name - first word of Sender - e.g. "John" if sender is "John Smith".
- From Second Name - second word of Sender - e.g. "Smith" if sender is "John Smith".
- Subject – is the email subject.
Default Surname Value - Specify which option will define the correspondent surname. For example, From Second Name.
The options are:
- Received Date – displays as [Received yyyy-MM-dd].
- Received Datetime - displays as [Received yyyy-MM-dd-HH-mm].
- From Full Name - full name of Sender - e.g. "John Smith".
- From First Name - first word of Sender - e.g. "John" if sender is "John Smith".
- From Second Name - second word of Sender - e.g. "Smith" if sender is "John Smith".
- Subject – is the email subject.
Default Given Value - Specify which option will define the correspondent given name. Refer to the Default Surname Value for options. For example, From First Name.
Default Type Value - Derived from the Correspondent Type, select which value will be entered at registration (e.g. Author, Addressee or Signatory). Leave blank if you do not have this field within your correspondent custom property set.
Save Email As - Specify which format the emails are uploaded into MAGIQ Documents.
- eDRMS EMAIL – Registers as .email. This format will open in the web browser.
- Outlook MSG – Registers as .msg. This format will open in outlook to allow users to reply to the email.
Action after Save - Choose what happens to the email after registration into MAGIQ Documents.
- None - Email will remain in the email folder.
- Delete Email from Outlook - Email moves into ‘Deleted Items’.
- Prefix Outlook Email Subject with Document ID - Email remains in the email folder, but place a Document ID at the start of the email subject line.
Word / Excel Metadata
Contains default document metadata settings for the MAGIQ Documents Word and Excel Connector. The meta data settings define how to automatically generate the document name, description and which document type to apply to new documents or spreadsheets.

Microsoft Word or Excel Settings
Default Document Type - Specify which document type to be used for documents and spread sheets.
Default Name - Specify which options from the below will define the MAGIQ document name.
Click Insert to select the relevant variable of:
- Current Date = [CurrentDate yyyy-MM-dd].
- Current Datetime = [CurrentDate yyyy-MM-dd-HH-mm].
- NULL = The name will come through blank for the user enter to a relevant name.
Default Description - Specify which options will define the MAGIQ Document Description.
Click Insert to select the relevant variable of:
- Current Date = [CurrentDate yyyy-MM-dd].
- Current Datetime = [CurrentDate yyyy-MM-dd-HH-mm].
- Title = Title specified within the document properties of the document or spreadsheet.
- Tags = Tags specified within the document properties of the document or spreadsheet.
Office Save to MAGIQ
Default AutoSave Settings - Specifies how document versions are saved/uploaded to MAGIQ Documents.
- Automatic - Word/Excel AutoSave or save button uploads new version each time.
- Manual - Word/Excel AutoSave or save button does not upload new version each time.
Default Save Action - Which default action do you want the connector to do once the document is saved to MAGIQ Documents.
- Keep Document Open - keep the document open so you can continue editing.
- Close Document and Check in - close the document and create as a new version.
- Close Documents and Keep Checked Out - close the document, but keep it checked out so you can continue editing offline.
Advanced

Maximum Number - Is the maximum number of folders displayed in tabs or windows. The default is "500".
If the total number of folders exceeds the limited selected, a message of ‘Too many folders to navigate’ displays.
Choose from the options of 50, 100, 250, 500, 1000, 2000 or Unlimited.
Hide MAGIQ Documents Panel on Start-up - Choose whether you want Show or hide the panel when Outlook, Word or Excel opens.
- Yes – The user must click ‘Show Panel’ each time they register emails, documents or spreadsheets.
- No – The Panel will always be displayed.
Description Field Mandatory - Choose whether to make the description field mandatory or not.
Use Foundation Custom Property Settings - Choose whether you want to see the additional custom property sets related to document types or specifed globally that have been configured with Foundation Manager.
Cloud Login URL - Displays the MAGIQ Cloud URL. Only for version 8.6.169 and below.
Import
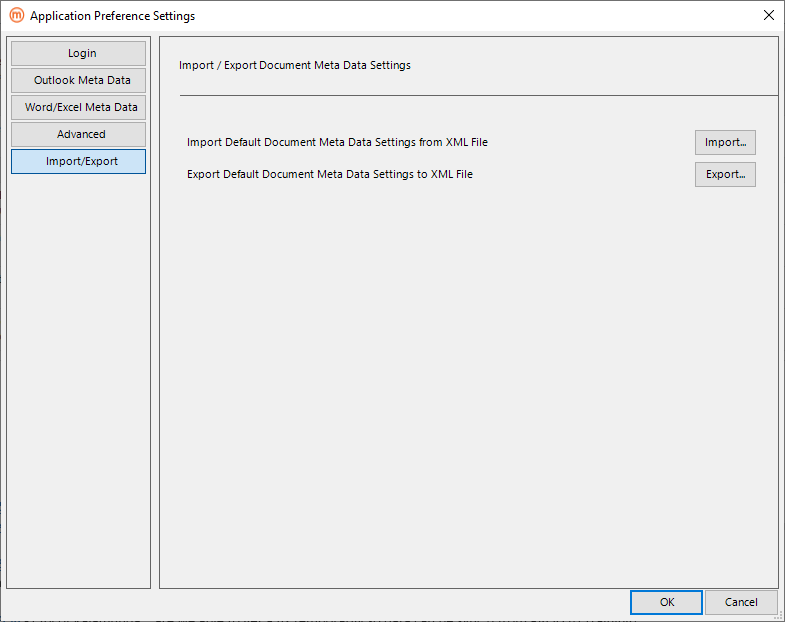
Import - Imports the preferences. This saves time in setting the application preference settings for every user.
Export - Exports (as an xml file) the preferences specified in ‘Meta Data’ for the import process.